
Learn all about floor screed and the benefits
If you are looking to install tiles on top of a concrete floor, the floor will need to be perfectly level, otherwise the tiles won’t be placed evenly. In order to level the floor correctly, many people opt for screeding to achieve the desired results.
What is floor screeding?
In short, screeding is the process of smoothing out the concrete floor to ensure a level working surface. The methods are used both in existing buildings, as well as new construction projects. Aside from achieving a smooth and level surface, screeding also helps cover up gas lines, water pipes, floor heating and other construction materials.
There are different techniques that help achieve the desired results. Sometimes it is necessary to grind or cut excess concrete, while other times the method involves applying a thin layer of floor filler in order to level out the floor to prepare it for floor tiles, wooden planks, carpets or any other material you wish on top of the bare concrete floor. Depending on the floor screed thickness, costs can vary, as well as the insulating effect it provides.

What types of screed are available?
Depending on your specific needs, budgets and overall expectations, there are a number of various types you can choose from, including the ones we have listed here:
● Liquid screeding
One of the more popular options these days, liquid screeding promises fast results, by using pouring methods to quickly distribute the filler material onto the concrete floor. This mix can vary from brand to brand, but generally consists of blended cement, limestone, sand and water.
This process is flexible since it provides excellent strength relative to other methods, and can be executed in less time than most of the other types. It does have a slightly higher cost per square meter, though the quality of the final result offsets the price in terms of longevity and overall finish.
● Sand & Cement screed
As the name suggests, this material is made from sand and cement, with various ratios of the two depending on the product and type of application. The material will be dried with the surrounding air, and will take between 4-7 days until fully dry.
Some of the benefits of using this method includes an affordable cost which hovers around the average price per square meter, the option to choose freely between fully bonded, partially bonded or unbonded screeds, and the possibility of installing the screed into falls and recesses.
● Lightweight screed
This type of screed is made of materials that are light in weight, and are often mixed with cement of different grades. Lightweight screed can work well on both floors as well as roofs, and have great characteristics with regards to a number of factors such as weight, strength, durability and more.
Lightweight screed needs to be bonded to the surface to ensure a flat and even result. The resulting surface can be slightly rough compared to other types of screeding, which makes this type ideal for uses where tiles, vinyl or other finishes go on top of the floor afterwards.
● Unbonded and bonded screed
For bonded types of screed, the filler material will be applied and adhering directly to the floor surface, for instance concrete. Compared to other types of screeding, bonded screeding involves using bonding agents and primers that ensure a good connection between the surface and the screed itself.
For the unbonded types of screed, they are poured onto an intermediary membrane, and thus not be in direct contact with the concrete floor. Depending on your needs each method has advantages and drawbacks, and which method is correct will depend on your individual construction details.
● Self levelling floor screed mix
By using a type self-levelling floor filler, results can be achieved by filling the entire concrete floor with the filler and letting it set naturally over time. Due to gravity and the chemical components of the filler material, the liquid solution will work its way down into grooves and edges, effectively levelling the floor.
Cost of concrete floor per square metre in the UK?
When calculating how much a project will cost, most people calculate the concrete floor cost per m2 in the UK. This means that we can roughly give an estimate based on the area you need covered. While not always 100% accurate it provides a solid guideline that helps clients budget correctly while planning.
While each type of floor screeding has a slightly different cost per square meter, on average prices range from £10 – £18 per m2. A few types of screeding, such as liquid screeding can have higher costs, up to £24 per m2. From this cost we estimate that the raw materials account for approximately 10-20% of the price, with the rest going to construction workers, equipment, delivery and other services.
How does screeding work in practice?
1. Preparing the floor
Before any floor screed project can start, it is important to make sure the preparation is completed. First the floor should be washed and cleaned. For the floor filler to work properly, there should be no residue, dust or dirt left to mix with the floor filler. This will allow the material to settle correctly and deliver the best final results.
It can also be necessary to fill out any deep gaps, or sand protruding parts of the concrete if the surface is uneven in places. By using a level tool, the workers can identify the areas that need manual adjustments, before laying the filler on top of the floor.
2. Priming the floor
Now that the basic preparations have been taken care of, it is time to prime the floor with a material that will coat the floor to ensure better adhesion between the floor filler and concrete floor, and also saturate any potential absorbent areas, so that the moisture is not drawn out of the filler and into the wet or damp floor below.
3. Laying the mix
Once the preparation is complete, it is time to mix the chosen floor filler materials. Once this has begun, a time window now exists to achieve optimal conditions for the filler material to settle and level out correctly.
Any deep recesses will be taken care of first, in order to achieve as level a working area as possible, before pouring the majority of the filler material. It can be necessary to use a putty or other filler to fill large gaps, and let that dry before adding the main floor filler materials.
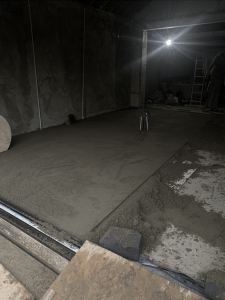
4. The resulting surface
Whether you need a latex floor screed job, vinyl or ceramic tiles, the surface has to be level and in good order. To test the results, professionals often use what’s called a screed level, that is similar to normal levels but with added accuracy. This will tell the workers whether they need to fix any one area of the floor screed, or whether the concrete has set correctly.
After the laying process minor adjustments can be made, but overall the goal is to achieve a resulting surface without the need for changes. This is where professionals come in handy, as their years of experience combined with their insight knowledge can provide these results, compared to a DIY project that might need extensive modification.
